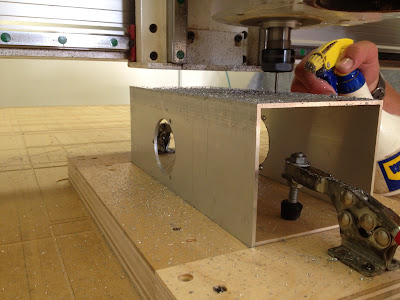
To cut the aluminum we used a Laguna CNC router. To ensure our aluminum was cut using the correct zero points we did two things. First, we created a pocketed jig that snuggly fit the aluminum frame. The jig was comprised of five wood pieces (four sides and a bottom) and two planar clamps. We framed the aluminum around the center of the bottom board and then used the planar clamps to hold the aluminum in place. The second thing we did to ensure our zero point was routing out a large section of the CNC table. We cut a pocket that held the jig at the zero point we defined for it. We then screwed the jig in place and used the clamps to switch out the aluminum pieces. Below is a picture of the aluminum frame mounted in the jig which was then screwed to the table.
 |
| Cutting Aluminum w/ Jig |
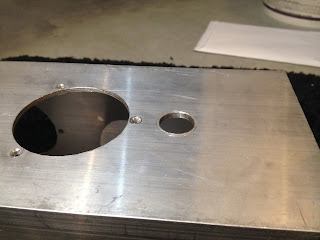
Due to the symmetry of our design, the opposing sides of the aluminum had the same cuts for the thrusters and for connecting the different sections. Each side of the submersible had at least four holes for mounting the thruster. The large holes fits our thruster grills and the three small holes are for M4 bolts. On top of these four holes, two of the four sides have four more holes (for a total of eight holes). These holes are for M6 bolts and will be used to attach either the front assembly, rear thruster, or a different aluminum section.
 |
| Four Holes |
 |
| Eight Holes |
After cutting out the aluminum we used a knife and de-burring tool to get rid of any sharp edges on the aluminum.
 |
| De-Burring |
If you have been watching the blog closely you will have realized that a couple holes seem to be missing – those for the downward facing LIDAR and the tether cord grip. We decided to wait on cutting these out until we're sure about the design. At the time we cut out the aluminum frame we were unsure of both.
After we had cut out the aluminum frame we decided to decided to cut the cord-grip hole using a drill press. We were able to get a relatively precise hole without the hassle (and time sink) of re-zeroing a CNC machine. We also purchased a 1/2"-14 NPT thread and thread the hole for the cord grip.
 |
| Hole for Tether |
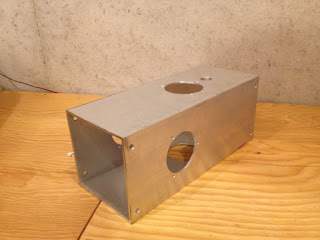
The final product looks quite nice and was manufactured using only 2D vector drawings, a CNC machine, and a few hours.
 |
| Isometric View of Rear Frame |
No comments:
Post a Comment