12.18.2013

Initial Body Designs

For the past couple of weeks we have brainstormed a few basic designs for our submersible. Currently we are trying to choose a design to pursue. This process is harder than we thought – the idea of having to commit to a design for the rest of the project is a daunting task. Thus we are writing this blog post to give an idea of what the ROV may look like.

Please comment with any thoughts on the designs!

Design 1

The forerunner of the three designs look a bit like your regular submarine:
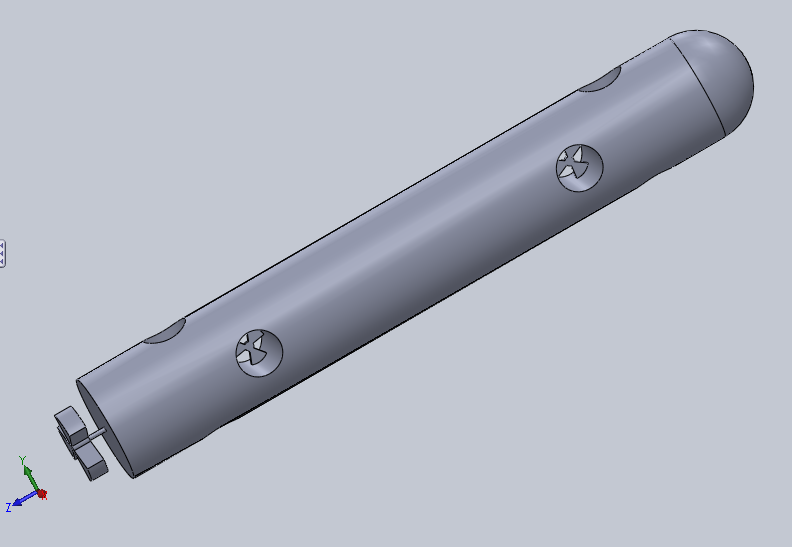
Isometric View

Top View


PROS:
  • Smallest frontal surface area
  • Precise control of everything but roll
  • One large motor and one large prop (takes less power and is overall more efficient)
  • Easily add new capsules (storage, experimental instruments, etc.) simply by elongating the ROV
CONS:
  • Small volume in which to fit stereoscopic cameras
  • No control of roll
  • Large side profile

Design 2

This design we called the winged sub (as you can probably see why). The two wing thrusters will be able to rotate (using servos), giving us most of our desired degrees of freedom:


Isometric View
Top View
Elevated Back View


PROS:
  • Medium amount of frontal surface area
  • Two large motors (better maneuverability and thrusting force)
  • Fewest thrusters
  • Control of all 5 degrees of freedom (including roll) 

CONS:
  • No strafing (must always be moving nose-first)
  • Needs servo motors for variable thrusters (another layer of complication)
  • Small volume in which to fit stereoscopic cameras

Design 3

The final design it to connect two identical cylinders:

Isometric View

Top View


PROS:
  • Two large motors (better maneuverability and thrusting force)
  • Control of all 5 degrees of freedom (including roll)
  • Two separate capsules for stereoscopic cameras

CONS:
  • Largest frontal surface area
  • Largest number of thrusters

Limbeck's Endeavors: New Blog

In light of other engineering "Endeavors" Limbeck Engineering will be apart of this year, we have started a new Blogger site. Although most of our work will be done on the submersible, we will also be working on completing an open source 3D Printer, variable pitch Windblade design, and tug of war robot.

Check out our new blog at:


12.01.2013

Overlay for VLCJ Embeded Media Player

There are many methods to create a transparent overlay for a VLCJ Embedded Media Player. Few, however, allow dynamic updating of swing components.


To create an overlay for a VLCJ media player window that can display dynamically updated data through Swing components, such as JLabels, you will need to begin by creating a nested class that extends JWindow, as shown here:

The only things that are required here are the extension of the class JWindow, the constructor, the super call, the call of AWTUtilities to set the window opaque, and the call to set layout to null.

The next step can be done in the constructor of the player class which you have used to create your media player. First create three global variables:


Then, these lines must be added to the constructor:


Altogether, these lines will specify your nested overlay class as the overlay for the VLCJ media player you created with EmbeddedMediaPlayer. 

A few specifics: 
  • the instance of the overlay class you create must be passed the JFrame that contains the Canvas declared later (whether this is your Player class itself or an object created within it, as it is here); 
  • the Canvas created here is the holder for your media player and its overlay; 
  • the setOverlay method will cause your Overlay class to be painted over the media player at run-time. 
With this done, all one has to do to have a swing component painted over the player is add it to the Overlay class in its constructor with a call of the add() method. A good way to do this is to create the swing components as static objects in the Player class so that they can be accessed by and changed throughout the program.